
Hardware techniques define how professionals build, maintain, and optimize computer systems. These methods range from selecting the right components to applying thermal paste correctly. Whether someone is assembling their first PC or upgrading an existing workstation, understanding these techniques saves time and prevents costly mistakes.
This guide covers the core hardware techniques every builder should know. It explains component selection, assembly methods, cooling strategies, troubleshooting practices, and performance optimization. Each section provides practical knowledge that applies to desktops, workstations, and server builds alike.
Table of Contents
ToggleKey Takeaways
- Mastering hardware techniques—from component selection to thermal paste application—prevents costly mistakes and saves time during PC builds.
- Proper assembly requires a static-free workspace, careful CPU installation, and correct RAM seating to ensure system stability.
- Effective cooling strategies, including air coolers, AIO liquid coolers, and optimized case airflow, extend hardware lifespan and maintain peak performance.
- Troubleshooting starts with basics: reseat components, check diagnostic LEDs, and verify BIOS settings before replacing parts.
- Performance optimization techniques like enabling XMP/EXPO profiles, overclocking, and disabling startup programs unlock extra speed from existing hardware.
- Regular maintenance—cleaning dust buildup and updating drivers every few months—keeps systems running smoothly and prevents common issues.
Understanding Core Hardware Components
Every computer system relies on several core components working together. Understanding each part helps builders select compatible hardware and apply the right hardware techniques during assembly.
The CPU (Central Processing Unit) serves as the brain of any system. It processes instructions and determines overall computing speed. Modern CPUs from Intel and AMD offer varying core counts and clock speeds. Builders should match their CPU choice to their intended workload, gaming, content creation, or server operations.
The motherboard connects all components and determines upgrade paths. It dictates which CPUs, RAM types, and expansion cards a system can support. Choosing the right chipset matters. An entry-level H-series Intel board won’t support overclocking, while a Z-series board will.
RAM (Random Access Memory) provides temporary storage for active processes. Most modern systems use DDR4 or DDR5 memory. Capacity matters, but so does speed. A content creator running heavy video editing software benefits from 32GB or more.
Storage drives come in two main types: HDDs and SSDs. Solid-state drives offer faster read and write speeds. NVMe SSDs connect directly to the motherboard and deliver the best performance. Traditional hard drives still work well for bulk storage.
The GPU (Graphics Processing Unit) handles visual rendering. Gamers and 3D artists need dedicated graphics cards. Others can rely on integrated graphics built into their CPU.
Power supply units (PSUs) convert AC power to DC and distribute it to components. Wattage, efficiency ratings (80 Plus Bronze, Gold, Platinum), and cable management options all factor into selection. Hardware techniques for power management start with choosing the right PSU.
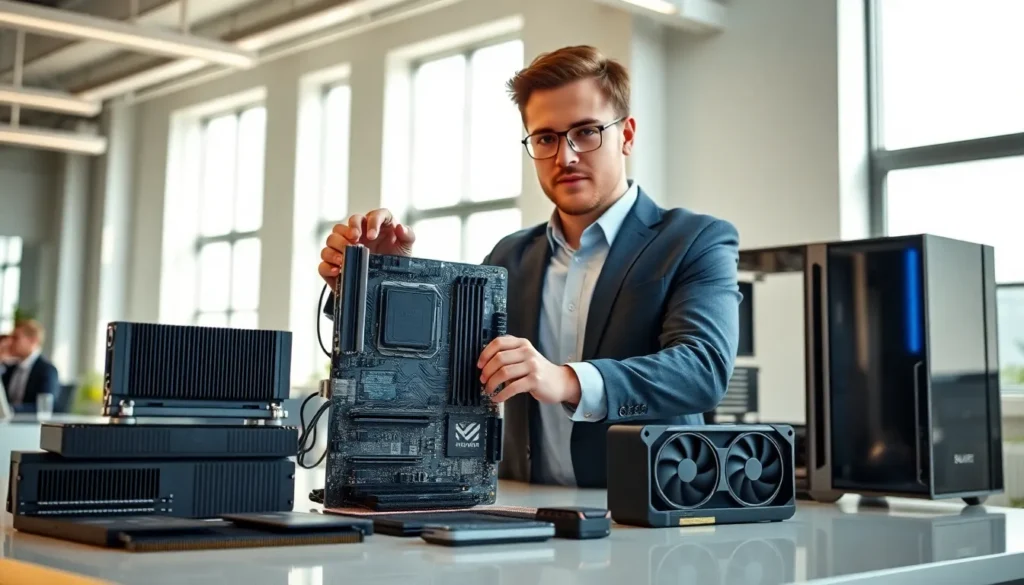
Key Assembly and Installation Techniques
Proper assembly techniques prevent damage and ensure system stability. Builders who rush through installation often face problems later.
Prepare the workspace. A clean, static-free environment protects sensitive components. Anti-static wrist straps ground the builder and prevent electrostatic discharge. Working on a non-conductive surface adds another layer of protection.
Install the CPU carefully. The CPU socket has a specific orientation. Matching the arrow or notch on the processor to the socket indicator prevents bent pins. Never force the CPU into place. It should drop in smoothly.
Apply thermal paste correctly. A pea-sized amount in the center of the CPU works for most coolers. The mounting pressure spreads it evenly. Too much paste creates a mess: too little causes overheating. This hardware technique directly affects cooling performance.
Seat RAM modules properly. The notch on the RAM stick aligns with the slot. Press firmly until the retention clips snap into place. Consult the motherboard manual for optimal slot configuration, usually alternating slots for dual-channel operation.
Mount storage drives securely. M.2 SSDs slot directly into the motherboard and secure with a small screw. SATA drives need both data and power cables. Proper cable routing improves airflow.
Connect front panel headers. These small pins control power buttons, LEDs, and USB ports. The motherboard manual shows exact pin layouts. Patience here prevents frustration later.
Route cables thoughtfully. Good cable management improves airflow and aesthetics. Most modern cases have routing channels behind the motherboard tray.
Cooling and Thermal Management Strategies
Heat kills components. Effective cooling extends hardware lifespan and maintains performance. Several hardware techniques address thermal management.
Air cooling remains the most common approach. Tower coolers use heat pipes and fins to dissipate heat. Larger coolers handle more thermal load. Budget builds benefit from affordable options like the Cooler Master Hyper 212, while high-performance systems may need larger dual-tower solutions.
AIO (All-in-One) liquid coolers offer better thermal performance in a compact package. They pump coolant through a block mounted on the CPU to radiators with fans. A 240mm or 360mm AIO handles most overclocked processors.
Custom water cooling loops provide the best thermal performance but require more maintenance. Builders design these systems with reservoirs, pumps, tubing, and water blocks. The upfront cost is higher, but temperatures stay lower under heavy loads.
Case airflow matters. Intake fans should pull cool air from the front or bottom. Exhaust fans push hot air out the rear or top. Positive pressure (more intake than exhaust) reduces dust buildup.
GPU cooling often gets overlooked. Graphics cards generate significant heat. Ensuring adequate clearance and airflow around the GPU prevents throttling. Some builders add aftermarket GPU coolers for better performance.
Monitor temperatures regularly. Software like HWMonitor or Core Temp tracks CPU and GPU temperatures. Sustained temperatures above 85°C under load suggest cooling improvements are needed. These hardware techniques keep systems running cool and stable.
Troubleshooting and Maintenance Best Practices
Even well-built systems encounter problems. Knowing how to diagnose and fix issues saves time and money.
Start with the basics. A system that won’t post often has a simple cause, unseated RAM, disconnected power cables, or a display cable plugged into the wrong port. Reseat components before assuming the worst.
Use diagnostic LEDs and beep codes. Many motherboards include debug LEDs that indicate which component is failing during boot. Beep codes also point to specific issues. The motherboard manual explains what each code means.
Test components individually. Swap out parts one at a time to isolate failures. If a system crashes randomly, testing with different RAM sticks can reveal faulty memory. Similarly, trying a different PSU rules out power issues.
Check BIOS settings. Incorrect memory speeds, disabled components, or boot order problems all occur at the BIOS level. Resetting to default settings often resolves unexplained behavior.
Clean systems regularly. Dust accumulates on fans, filters, and heatsinks. Compressed air removes buildup without damaging components. Cleaning every three to six months maintains optimal airflow.
Update drivers and firmware. Outdated drivers cause compatibility issues and performance problems. GPU drivers, chipset drivers, and BIOS updates address bugs and improve stability. These hardware techniques for maintenance prevent many common issues.
Keep spare parts handy. A spare PSU, RAM kit, or bootable USB drive speeds up troubleshooting.
Performance Optimization Methods
Building a system is just the start. Optimization hardware techniques squeeze more performance from existing components.
Enable XMP or EXPO profiles. RAM often ships rated for speeds higher than the default JEDEC specification. XMP (Intel) and EXPO (AMD) profiles in the BIOS unlock these rated speeds. A few clicks can boost memory bandwidth significantly.
Overclock the CPU (when supported). Increasing clock speeds improves performance in CPU-bound tasks. Start with small multiplier increases and stress test for stability. Monitor temperatures closely. Not every chip overclocks equally, silicon quality varies.
Tune GPU settings. Software like MSI Afterburner allows GPU overclocking and fan curve adjustments. Undervolting is another option, it reduces power consumption and heat while maintaining performance.
Optimize storage performance. Enable TRIM for SSDs to maintain write speeds. Ensure NVMe drives run in their fastest PCIe slot. Avoid filling drives beyond 80% capacity, as performance degrades on nearly full drives.
Adjust power plans. Windows power settings affect CPU behavior. The “High Performance” plan keeps processors at higher clock speeds. Ryzen users should install the AMD chipset drivers, which include optimized power plans.
Disable unnecessary startup programs. Background applications consume RAM and CPU cycles. Task Manager shows which programs launch at boot. Trimming this list improves responsiveness.
Keep software lean. Bloatware slows systems down. Fresh Windows installations run faster than manufacturer images loaded with trial software.


